Showing posts with label baking. Show all posts

Friday, December 11, 2009

My Little Gingerbread Army

Timeline of Michelle's transition into the Christmas spirit:
24th of October - Walking through Big W exclaiming "Oh come ON, its not even my BIRTHDAY yet!" every time I walk past Christmas decorations.
13th of November - Late night shopping in the city, shaking my head in disbelief at the groups of carollers singing around the place. Followed by me telling everyone I spoke with over the next week about my disgust.
20th November - First suggestions of work Christmas party and Secret Santa are made, Silly Season seed is planted...
25th November - Christmas party confirmation. Secret Santa present brainstorming begins.
29th November - Secret Santa present decided: Gingerbread men. Christmas excitement growing rapidly, even though getting excited about Christmas before December is technically ridiculous.
3rd December, 2am - Covered in flour and bits of dough, smelling of nutmeg, ginger and cloves, trying to use previously mentioned Christmas spirit to stay awake, thinking it should be stronger now that it is officially December.
4th December - Trying not to allow Christmas spirit to dwindle, even though Gingerbread men made of my own blood sweat and tears (figuratively speaking, of course...?) were grossly under appreciated. Instead decide to focus on open bar and steak the size of my head.
Present - Presents are slowly being bought, Christmas trees are slowly being put up, Christmas Spirit definitely in full swing. Thinking of going late night shopping in the city again to fully appreciate carollers, that's if they haven't already been replaced by people dressed as Easter Bunnies or something...
Hopefully all of you are getting into the Christmas Spirit too, though hopefully less grudgingly than me... Please enjoy these ASTOUNDING Gingerbread men, not astounding because I am fully against being modest, astounding because Martha is a clever ol' bird and has made the loveliest Gingerbread I've ever had the pleasure to try. I was impatient (as per usual) so made mine thicker than suggested, but I think it only made them better, they aren't a chewy biscuit, so it was good to have them thicker so you could enjoy more of the soft biscuit-y goodness. It's been pointed out that my cookie cutter makes somewhat unconventional Gingerbread men, with one review stating "I don't know why but their feet and sloping shoulders look so cute." If you too like their sloping shoulders, I got mine from House. So yeah, even though they are kind of time consuming, I wholeheartedly recommend you give them a go, and then tell me how they went, I love seeing how people decorate their own!

I really need to learn to read recipes all the way through before beginning. It wasn't until I had finished mixing the ingredients together (at like 11pm) that I read the part about having to chill the mixture in the freezer for a whole entire hour. Not cool. Ha, freezer, cool. (Note, this is bag of mixture #1 of 3, if this gives you an idea of just how much mixture this recipe makes!)

But once the mix was all properly chilled i realised just how necessary it was, rolling the room temperature stuff would NOT have been fun. Chilled definitely WAS. (P.S. Nice food posing Michelle, didn't even put the cookie cutter up the right way).

Cookies baking, and no, the camera isn't tilted. I bought cookie trays before measuring my oven, resulting in all my baking being ever so slightly lop sided...

Just SOME of the gingerbread men! That Martha, my oh my, she certainly doesn't do things by halves. You should though. I don't think anyone needs this many gingerbread men.

Day 2: The decorating begins. While I love everything about this bowl of icing pre-mixed, there was nothing to love about it post mixed. Worst. Purple. Ever.

Sister Meagan (of the non nun variety) beginning the decorating festivities. It looks posed, but she really was like, milliseconds away from putting hair on that little guy. (The icing bag is the one I'm talking about later on).

Putting the finishing touches on her Gingerbread Borats. Because one is never enough.

The men! Oh, I'm sorry, and the ladies, and the one genderless baby. Meagan's are the six on the right, mine are the rest on the left. I'm not sure how we got so off course on the whole traditional gingerbread men front, I even googled pictures of them for ideas, but somehow we got caught up amongst a sea of toga wearing greeks, overalls and rockstars. I think i like them better this way.

One of my favourites, and incidentally one of the first to be ripped apart by my secret Santa receiver. My heart broke a little when i saw his beautifully styled hair being brutally separated from his slick little bowtie... He'll always hold a place in my heart...

Gingerbread Men

Martha Stewart's Cookies

Makes lots, can't remember exactly but I'm guessing almost 30.

Ingredients

  • 5 1/2 cups plain flour (US cups, but it was too late in the evening for me to fiddle around with conversions so I just went nuts and used metric)
  • 1tsp baking soda
  • 1 1/2 tsp salt (I used normal salted butter so left out the extra salt)
  • 4 tsp ground ginger (nuts, i know, this is why i would feel safer it if were halved!)
  • 4 tsp ground cinnamon
  • 1 1/2 tsp ground cloves
  • 1 tsp ground nutmeg (Martha was going on about fresh ground nutmeg, but she's fancy and I'm not so I just went for the jar stuff)
  • 225g unsalted butter (as I said before, i went for the normal stuff).
  • 1 cup packed dark brown sugar (I usually just skip the dark bit and go for normal brown sugar, but i figured gingerbread is meant to be all dark and syrupy so I lashed out and got dark, it was way worth it)
  • 2 large eggs
  • 1 1/2 cups unsulfured molasses (what the heck right? I just used golden syrup, it may not have been unsulfered (does that make it sulfered?) but it still did the trick)

Method

  1. Whisk together flour, baking soda, salt and spices in a large bowl. Set aside.
  2. Put butter and brown sugar in the bowl of a standing electric mixer fitted with the paddle attachment. (As per usual, didn't read this part of the recipe at all, so just used normal beaters, the mixer struggled, but that probably had something to do with the 5 cups of flour...) Mix on medium speed until fluffy. Add eggs and molasses and mix until combined. Add flour mixture; mix on low until combined. Divide dough into thirds, wrap each in plastic. (I used sandwich bags, I heart sandwich bags. Sorry environment.) Chill 1 hour.
  3. Preheat oven to 175C. Line two large baking trays with baking paper.
  4. On a generously floured (superclean) benchtop (Martha rolled hers out on the cookie trays, but my rolling pin was too big to do that so yeah, that's why I went bench) roll dough just under 1/4 inch thick. Brush off excess flour and freeze until firm, about 15 minutes. (I didn't freeze after I rolled it, i just got in there quick and cut it up before it got too warm. With the extra bits of dough, roll them back up into a ball and pop them back in the freezer while you're rolling out the next batch, keeps it all nice and cold and rollable.)
  5. Cut dough with cookie cutters (Martha used snowflake shaped cutters, super pretty, but I've never seen them in Australia, plus who can go past a good old fashioned Gingerbread man?). Place dough onto prepared baking sheets, freeze until firm, around 15 minutes. (God, you'd think martha wanted to marry a freezer the way she keeps going on about them. I fully didn't freeze them and don't feel it had an overly negative effect. They kind of bumped into each other and stuck, but I think that's because I put them too close, plus they were on a slope...)
  6. Bake cookies for 12-14 minutes, or until crisp but not darkened, rotating sheets halfway through once and firmly tapping down pan. (My oven right now is weird and cooks SUPER fast and dries EVERYTHING out, so mine cooked quicker and I probably took them out a little early out of fear of ruining them, but they were still awesome. Some hot a little burnt because I forgot about them, but I kind of liked them like that, they were crunchy with a pretty nice taste, so you really can't go wrong! Oh and the tapping thing, it was like 1am by the time I got to the actual baking stage, and the firm tapping was a bit loud for the roomies so I skipped that step). Transfer cookies to wire wracks to cool completely.

And now for the icing! Martha's had something called 'Meringue Powder' or something so I found a less weird, slightly more dangerous recipe on the internet. (Yeah, some people live on the edge by speeding, patting sharks etc, me? I'm all about the raw egg whites baby.)

Royal Icing

Best Recipes

(I shouldn't be giving them a mention, the stupid website doesn't let you copy the text. How do they expect me to steal their recipes quickly and easily??)

Because I had lots of Gingerbread men I quadrupled this recipe, too much, but better to be safe than sorry. For a regular batch I'd probably double it.

  • 1 egg white
  • 1 cup icing sugar (Have a little extra on hand, I had never made this before so didn't really know what it was meant to look like, but it seemed a bit runny to me, so I just kept shaking in a little icing sugar at a time till it looked firm enough not to run straight off the gingerbread men.)
  • food colouring

  1. Place egg whites in a clean, dry bowl and beat with an electric mixer until soft peaks form.
  2. Gradually add icing sugar until soft peaks form. (Ha, just read this properly, there was nothing gradual about my icing sugar adding, whoops).
  3. Divide icing into bowls, add food colouring and stir until combined.
  4. Spoon the icing into separate small freezer bags, snip the ends and pipe onto cooled biscuits. (I have always sworn by using freezer bags for icing, but I have recently discovered the light, it is bright, convenient, and alot less risky (writing on my friend's birthday cake, freezer bag exploded, I cried, bad memory). I am not going to admit how long I just scoured google to find these things so I could link to them, but yeah, no luck. They're just plastic disposable icing bags, and they come with icing tips as well, only like 3 bucka or something, totz worth it, I would recommend them to the Pope if he were interested.)

Sunday, November 8, 2009

Accidental Absences and Macadamia Mania

Why hello! If you are reading this, thankyou for coming back to check on me, even though I have been lame and haven't given you any fun food to look at in a while. If you aren't reading this, then, um, woah... I just blew my own mind. So, did my absence make your heart grow fonder? If it just filled you with annoyance at my laziness then i plead with you to forgive me, please, ill even show you how to make the best white chocolate macadamia cookies you could possibly imagine. Now come on, who can say no to that? People with diabetes maybe, but yeah, im sorry. I have excuses though! Lots! My long list of excuses all began on Thursday the 15th of October at 4:36pm. I remember it vividly, I was lying on my bed watching "Madmen" thinking how much that show makes me wish i were a smoker when my phone rang, and it wasn't my mum! I know, crazy. Turns out it was some lady asking me to get my behind to Brisbane for an interview to be part of their collections team! Cue frenzied panic crossed with utter joy, which was not hampered by the fact that i didn't totally know what the job i was being offered was. I ran around and found my interview handbag and shoes, then brushed the dust off of them, then put on my interview clothes only to find that my months of baking had left them, slightly undersized. Cue more panic and a trip to target, thank gosh for Thursday night shopping. I then drove my way up to Brisbane and turned up on my sisters doorstep with an air mattress and a bag of crispy m&ms (a driving necessity). After a night of talking, toast eating and valley dropping off I came home and laid out my interview clothes and went to bed, but not before i jumped on my laptop and tried to find out just what a "collections officer" was. Next morning i was interviewed and then instantly offered a job! "I must have really impressed them!" I thought, so naive. They asked me to start on the Monday so after a quick trip to a cupcake shop with my sister I went back to Ballina to pack. By Sunday night me and my bird Rolly were all settled in to my sister's cute little previously blue house. It is now three weeks later and I am now an official debt collector. It isn't a cool feeling to be a debt collector, i will tell you that now. I call people all day and ask for money, which of course is then their cue to abuse the hell out of me, which, while completely understandable, makes the working day not so enjoyable. My second day I was told by a debtor "you're awful chirpy for a debt collector." While three days ago I was given a wake up call when a debtor asked me if I "was trained to be this rude." My chirpyness, it is leaving me, and this, I do not like. Of the seven people trained since I started, only 3 of us are left, and I have seen two other older workers quit. I hope I am lucky enough to be one of them soon! While I was astoundingly relieved to be finished with the job hunting game, I shall start again, if only for my personality's sake. So wish me luck, and I shall reward you with cookies you will tell your grandchildren about. I personally can't wait for that so Im just walking round telling other people's grandchildren.
Macadamia chopping: fun. White chocolate chopping, not very thoroughly thought through. After these few pieces were chopped I went back to the drawing board and added a step: cool white chocolate in fridge if weather is astoundingly hot for October.
Look! Brown butter! Brown butter I made all on my little lonesome! This is another of those things i always read about in American recipes but am always too scared to try. Im so glad i went for it, it was awesome. Thankyou Joy for giving such awesome instructions on exactly how it all works, and what should happen when. If it weren't for those instructions I would have chickened out before the 'brown' part happened and would have just ended up with hot butter.

This is the 'brown' bit im talking about, see? They're little burnt bits of butter which makes the mixture taste kind of nutty, I think from now on im going to be using brown butter in ALOT more things.

This photo makes me want neenish tarts! Ooh, I saw a recipe for those today, i hope i make that happen, real soon...

Here is my lovely little ball of deliciousness. If you are wondering why it is still a ball, well, let me tell you. Since Cassie from howtoeatacupcake talked about freezing balls of cookie dough before baking them in one of her recipes I have become a little obsessed with it. It works so well, it leaves the middle slightly squishy and more puffy, it helped me perfect my favourite peanut butter cookies, and I figured it would do the same here. A few things happened though, I got distracted by visitors and ate lunch and left the trays of cookie dough in the freezer for AGES, and i put heaps of macadamias and white chocolate in the mix, AND i didn't cook them long enough, which all culminated in these little miracles. They are thick and raw in the middle, I couldn't have hoped for anything better. I love when my cooking mistakes turn into something beautiful.

Brown Butter White Chocolate Macadamia Nut Cookies

Joy the Baker (who adapted it from Betty Crocker)

For Joy it made two dozen small cookies, while for me, I havent got a clue. I just made them as big as I wanted. Make them as big as your judgement suggests, then add a little more!

Ingredientes (that's Spanish for ingredients, just in case i lost you.)

  • 115g butter (direct quote from Joy: don’t even think of using margarine)
  • 1 cup packed light or dark brown sugar (I used normal, I think joy wrote at some point that it doesn't really matter which you use.)
  • 2 Tablespoons milk
  • 1 large egg
  • 1 teaspoon vanilla extract
  • 1 3/4 cup plain flour
  • 1/2 teaspoon baking soda
  • 1/8 teaspoon salt
  • 1/2 cup coarsely chopped macadamia nuts (I chopped them in half because i wanted a flavour explosion. And I used more than recommended, once again for the flavour explosion.)
  • 1 cup white chocolate chunks (i just chopped up white chocolate, its so much bigger than choc chips!)

Método (are you catching on to my theme yet?)

  • Preheat oven to 175C. In a medium saucepan melt the butter, swirling and stirring the butter until nicely browned bits appear in the bottom of the pan. This may take about 5-7 minutes. Once the butter is browned, remove pan from heat and set aside to cool a bit while you measure out the dry ingredients and set them aside.
  • In the bowl of a stand mixer add the brown sugar and slightly cooled butter. Beat on medium speed for about 2 minutes. Add egg and beat for one minute more. Add milk and vanilla extract and beat to incorporate.
  • Turn the mixer off, scrape down the sides of the bowl and add the dry ingredients all at once. With either the stand mixer on low, or by hand with a spatula, incorporate the dry ingredients until just mixed in.
  • Fold in the chopped nuts and white chocolate chips.
  • (Eat a spoonful of mixture and tell me if it tastes like aromatherapy oil to you. Other taste testers assured me i was being silly, but I need more opinions. Don't worry if it does, the taste does not carry on past the baking stage.)
  • Scoop two teaspoon sized balls onto a lined baking sheet. Bake for 9-11 minutes or until cookies are deliciously golden. Remove from oven and let rest of the baking sheet for 3 minutes before removing to a cooling rack.

Wednesday, October 7, 2009

Now we're baking with yeast!

You know how a few posts ago i was going on about how i don't BAKE bake, like, i have no patience for bread baking and all that? Well, turns out my curiosity has overpowered my laziness. And now I'm here to tell you that while curiosity didn't kill any cats, it definitely resulted in some meeeean monkeybread. "Monkeybread?!" i hear you fellow Australians say, what the heck is monkeybread??" Well I'm here to tell you that it is not as weird as it sounds, its more, heavenly than weird. Yes, heavenly, that is definitely the word i was looking for. I've seen lots of recipes for it on American blogs, its usually made in a big loaf, and yeah, it didn't really appeal to me, then i saw this recipe on cupcake project. How did she make me take the leap? She did two things: She changed the loaf into cupcakes (probably the same amount of work, but shh, this is not the time to point out such boring things) and she added chocolate and banana to the mix. Genius. Deliciously inspired. All resulted in something that tasted like a doughnut, but better. Well, id better stop rambling and get to the process, there were alot of different steps involved but it was fun and totally worth it, heeere we go!
First thing first: open up the yeast. Second up is being weirded out by the yeast. Isn't it weird? I don't know why i feel this way, i just do. I guess i just pictured it differently...
After much mixing and kneading (i wasn't even TOTALLY sure how to knead, so i was pretty happy it worked at all!) i got this pretty little ball of dough. My little dough baby.
Then after an hour of letting it hang out on the bench it doubled! Magic! My little baby, all grown up!
Next up I got the cinnamon sugar ready. I was pouring out the cinnamon and noticed something weird (yes, weirder than the yeast, which is really saying something). I couldn't get a clear picture but look at the bottom lip of the jar, see those strands of cinnamon? It was like they were magnetic or something. You remember that toy, it is a little box with a mans face in it, with metal shavings, and you give him a beard and stuff? It was just like that, but without the facial hair fun, if anyone 'gets' science and knows what went on here, fill me in yeah?
So here is the ball of dough before i put the banana and chocolate in, just to help you get an idea of how big to make it. It fully doesn't matter though, make them bigger, littler, doesn't matter, but yeah, doing them this size i got 12 cupcakes and had a good bit leftover, so don't hold back.
Some of the prepared doughballs next to the tasty coating production line. With mine i kind of just placed the doughballs on top of one another and you'll see later how they turned out, kinda uneven, but i was still happy with them, i just ripped them apart anyway. Though if you look at the cupcake project's cupcakes they were like, a perfect little dome, if you re aiming more for that kind of look then i reckon you should try and put them in the case right next to each other... Let me know if it works...
So here they are just placed in, you can see the ones at the bottom starting to puff up already, probably lame but it was all very exciting at them time! ... okay, I'll admit it, i still think it's exciting, so here are some before and afters, prepare to be amazed by the magic of yeast!
Before...

After! They're just about taking up the whole case now!

Close up before...

Close up after! Pfoosh! (if it didn't happen so slowly i would imagine this is the noise they would make.)

Awesome stuff. Ive always thought being a professional baker would be horrible, those early mornings, bleh, but now i get it, they get to watch this sort of thing happen every single day, lucky bastards.

Sigh, isn't she beautiful?

Okay, one last thing, before you go down and look at the recipe i just want to say that i know it looks like there alot of mad steps, too much to do, too fiddly, but really, its not, i swear! You'll need a bit of time spare but everything involved is super easy and you will be so happy with them once you finish, promise!

Monkey Bread Cupcakes with Banana and Chocolate

Recipe from the Cupcake Project

Makes 12 cupcakes

  • 1/2 C lukewarm water
  • 1 T vegetable oil
  • 1 large egg
  • 1 t salt
  • 1 T sugar
  • 2 T instant yeast or rapid rise yeast
  • 2 C - 250g plain flour (i only just realised recently that US cups and Metric Cups are a little different so that's why I've gone grams, for those who don't have scales just take out about 1tsp per cup, it usually doesn't make a difference but i thought with dough it might...)
  • 1/2C - 115g granulated sugar (i also just really like using my scales, that's why you're getting even more grams!)
  • 1 T cinnamon
  • 1 ripe banana, cut into small slices
  • chocolate chips or baking chunks to taste (55g) (This is what was recommended but I ended up using sooo much more than this! I just got a block of chocolate, cut the squares in half and put one piece in each ball)
  • 2 T unsalted butter, melted

1. Place water, vegetable oil, egg, salt, sugar, and yeast in a medium bowl and mix well.

2. Add 1 cup of the flour, stirring to blend.

3. Add the second cup of flour, stirring to make a cohesive dough. (I had no idea what a cohesive dough was, and google was no help, so i just mixed it till it looked good. I'm guessing cohesive is like the glue cohesive, so till the dough sticks together? smart?)

4. Let the dough rest for 5 minutes; this gives the flour a chance to absorb the liquid, making it easier to knead.

5. Knead the dough — by hand, mixer, or bread machine — until it's soft and smooth.

6. Place the dough in a lightly greased bowl or large measuring cup, cover it, and let the dough rise for 30 to 60 minutes or until it's doubled in size. (I left mine for an hour but only because i got a phone call, if i were one of those people who can balance a phone under their chin i so would have gotten to it earlier)

7. Gently deflate the dough.

8. Mix the cinnamon and sugar in a small bowl.

9. Place cupcake liners into a cupcake tin and lightly grease them with butter or cooking spray. (make sure that if you spray them you do it as late as possible, i did mine a bit early and later realised it made the colour from the cases stain the tin! Weird...)

10. Pull off a small piece of dough. How small? You should get 24 pieces out of the batter so that you can have two pieces in each cupcake. However, unless you are having a dinner party for exactly 12 people, it doesn't really matter and you can make the pieces whatever size you would like.

11. Stretch the piece out, put a banana slice and several chocolate chips or baking chunks inside, and then roll it into a ball. (If this sounds a bit confusing make sure you check out the original recipe page, she has a picture of this)

12. Dip the ball in the melted butter.

13. Dip the ball in the cinnamon and sugar.

14. Put the ball into the cupcake liner. You should be able to fit two balls into each cupcake liner.

15. Cover the cupcake tin and let the bread rise for 30 to 60 minutes, until it's visibly puffy. Towards the end of the rising time, preheat the oven to 175C.

16. Uncover the cupcake tin and bake the monkey bread for 25 to 30 minutes, until it's golden brown and feels set.

17. While the monkey bread is baking, prepare the glaze.

Cinnamon Glaze

Also from the Cupcake Project

  • 1/2 C powdered sugar (i put in a little more cause it seemed a little runny and i didn't want it all to just pool at the bottom)
  • 1 T milk
  • 1/4 t cinnamon

1. Mix all of the ingredients together. 2. Drizzle over the hot cupcakes. 3. The cupcakes are best served warm. If you can't eat them immediately, reheat them in microwave for about 15 seconds before serving.

Wednesday, September 30, 2009

The markets and me.

Ive mentioned a few times how i had my own market stall now, and im sure, there are people suffering from this, suffering from curiosity! I know, its mad and exciting and its just plain wrong that ive kept it from you all for this long. Well im here today to tell you that you need wait no more, its market stall time. (much like hammer time but with tighter pants). A couple of times this year people suggested that i get a stall at the markets, but i never really considered it, so much effort, dont know how to go about it and all that. Then one thursday i got a flier in my mailbox saying that market stalls at the sunday markets down the road were only $10, and that if you bought the flier, you got a dollar off at the sausage sizzle. the cheap stall got me thinking, but the latter was definitely the clincher. That night I made a list of the cupcakes i wanted to make, then started the mad task of figuring out what ingredients i needed to buy, what extra things i would need (gloves, plates, plastic bags and all that jazz). After that i went onto the woolies internet shop and did HEAPS of maths and figured out how much it was going to end up costing me per cupcake so i could figure out how much to charge. and even though i was watching back to back episodes of true beauty, it was not a fun night. Friday and Saturday the shopping was started and finished, with much restless sleep and worrying that I'd forgotten something in between. Then came the baking. Oh me oh my, so much baking! I'd gotten the cookies out of the way on the friday night, but that still left the cookie dough cupcakes (which i had to make the cookie dough for as well as the cake!), the black bottom cupcakes, the brownies (i wasnt sure if i would be able to cut them into pretty enough squares so they became cupcakes too!), the chocolate banana cupcakes (my mum always made chocolate banana cake for my birthday, these HAD to be included!) and lastly, the upside down strawberry cheesecakes (which i shall be going on about today!). I started around 2pm (too late!) and transformed into a baking MACHINE (sigh, i wish i were speaking literally here). organise ingredients - mix ingredients - bake - clean - repeat alot untill you have sufficient baked goods. Baking for me stopped around midnight or so, then the icing began. Here was where i had to ask for help, cut to me sitting at the dining room table covered in icing sugar decorating the cupcakes while mum made signs and used the leftover cookie dough to make sample cookies with some weird movie in the background starring Isabella Rossellini, man that woman is hard to understand, or maybe it was the icing sugar in my ears? By two thirty in the morning the table looked like this. I was done. It was a miracle. Maybe not on the same miracle level as like, baby jesus and his immaculate conception, but still, it was pretty amazing. Five thirty i was back up and practically lying on the heater while eating toast. Dad was lovely enough to walk down to the markets super early to secure me an awesome spot and set up the table and brollie. He did astoundingly well! I got a spot with no stall on the other side, so everyone was either looking at me cakes or straight ahead, and i greeted all of them. My voice was hoarse and my cheeks aching from the constant smile by about 10am, i was so perky it literally hurt! But it also helped me to make moolah, and encouraged a man to let me play with his itty bitty pug puppy, adorable times a zillion. It was fun to see the trend of excuses for not buying my cupcakes as the day went on... 7am - 8:30am: "oh ho ho hoo no, i haven't had breakfast yet!" 8:30am - 10am: "oh ho ho hoo no, i've just had breakfast!" 10am - 1pm: "oh ho ho hooo no, i shouldnt, im on a diet!" All responses were accompanied by a pat of the belly. I wish i would have filmed it, i would have pitched it to david attenborough and we could have worked together to inform the world in a classy accent about this strange species: the market goer. Finally the end of the day came, and packing up began. I was just about to throw out the display samples when my friend and my mum's friend turned up, circling the table... me - well i guess it's time to throw these babies out. my friend - what? you arent going to sell those?? me - theyve been sitting out uncovered for 6 hours, people have been breathing on them, lots of people. my friend - *incoherent cupcake chewing sounds* mums friend - yoink! *chewing noises continue* they may have possibly gotten cooties, but on the plus side their "oh yuuum!" noises bought customers over to buy the last few cupcakes, good for me! So thats pretty much the end of my cupcake stall story, it was long, i know, im sorry, im not so good at the summarising... but yeah, to finish up, we went home and counted our moolah, minus-ing the float to see our profit and counted up 92 dollars. this was quickly followed by me looking devvo'd and whispering "but i spent ninety FIVE dollars... i worked for days to LOSE three dollars???" (i never was a good sport...) much relief was felt when mum remembered she hid some money in my car incase we got mugged by a gang of market goers. so all math mistakes aside i ended up selling $210 worth of cupcakes, a total profit of 110 bucka! not so bad huh? probably ended up at like $2 an hour for my (super intensive) labour but i didnt care, i made profits, i got to bake HEAPS without the worry i was fattening up the fimfam, and i got to hang out with my mum and see what it was like to be on the other side of the market experience. The markets were in town again last sunday, i got the flier again, i considered it, then decided to end on a high note. I want to be that mysterious girl who only came to the markets that one time, that everyone hopes will one day come back and smile fondly at their belly patting. Here is my little stall all set up, and my pretty pokey (my car) in the background. Oh! and mum sneaking in in red on the right! See how dewy the ground is? it was so early and cold! Now back to (nearly) the beginning. The actual making of the cupcakes. I picked this one to make cause it was my favourite, plus i took the most photos of it! Market baking day didnt leave much time for photo taking so a few of these photos are from when i cooked them before. Doesnt this strawberry just look derish? In the cases. It may look like alot of strawberries but it turned out really well, they kind of smooshed together and into the cake, its making my mouth water just looking at it! OH! and when you make these, make sure you put some of the strawberry pieces on a spoon and dip it in the mix and eat it. Its one of the best things i have ever tasted. for serious. Here they are cooling, arent they pretty! You can see the strawberry peeking through, trying to say hello! Here they are all nice, iced, and decorated with crushed gingernut biscuits, ready to go to market. Upside Down Strawberry Cheesecake Cupcakes The Hummingbird Bakery Cookbook (pretty much the best cookbook i have. everything i have made from it has become an instant favourite, i highly recommend it!) Makes 12 (I think i only ended up with 9 or 10 cupcakes each time and there wasnt that much cake in each of them, so dont try and spread it out to make 12, they'll be lame).
  • 120g plain flour
  • 140g caster sugar
  • 1 1/2 tsp baking powder (im sure that instead of the baking powder and plain flour you could just use self raising, but im too scared to try it!)
  • pinch of salt (i think its so silly that so many of these recipes tell you to use unsalted butter and then add salt. I always just skip the salt and just use normal butter)
  • 40g unsalted butter at room temperature
  • 120ml whole milk (i used low fat, they were still awesome to the max)
  • 1/2 tsp vanilla extract
  • 1 egg
  • 12 large strawberries, chopped into small pieces (i chopped up a whole punnet which was like, 12 small strawberries and it was too much)
  • 200g digestive biscuits (i used gingernut biscuits because i use any excuse i can get to put ginger in everything. I blended like half the packet and it was WAY too much, so dont waste good biscuits!)

  1. Preheat the oven to 170C, place paper cases in a 12 hole muffin tin.
  2. Mix the flour, sugar, baking powder, salt and butter with an electric mixer on low speed until you get a sandy consistency and everything is combined.
  3. pour in the milk and vanilla extract and beat on medium speed until all the ingredients are well mixed. Add the egg and beat well for a few minutes to ensure the ingredients are well incorporated.
  4. Divide the chopped strawberries between the paper cases. Spoon the cupcake mixture on top until 2/3 full and bake for 20-25 minutes, or until light golden and the sponge bounces back when touched. A skewer inserted in to centre should come out clean. Leave the cupcakes to cool slightly in the tray before turning out onto a wire rack to cool completely.
  5. Roughly break up the biscuits and put them in a food processor. Process until finely ground. When the cupcakes are cold, spoon the cream cheese frosting on top and finish with a sprinkling of finely ground biscuits.

Cream Cheese Icing

Humming Bird Bakery Cookbook

Makes enough to frost 12 cupcakes - double the recipe for a 20cm cake

  • 300g icing sugar, sifted
  • 50g unsalted butter, at room temperature
  • 125g cream cheese, cold

  1. Beat the icing sugar and butter together with an electric mixer on medium slow speed until the mixture comes together and is well mixed. (this really isnt alot of butter, so it was really hard to get it to mix through the icing sugar, so i always just end up putting the cream cheese in early and it still ends up great)
  2. Add the cream cheese in one go and beat until it is completely incorporated.
  3. Turn the mixer up to medium high speed and continue beating until the icing is light and fluffy, at least 5 minutes. Do not over beat as it can quickly become runny.

Monday, September 21, 2009

Savoury? More like flavoury!

When i say im a bake-aholic, i really mean that im a sweets bake-aholic. I read bread recipes and go 'eh, all that effort, and i still have to put something on it to taste good?' I think the closest i ever came to real savoury baking was the cheese and vegemite scrolls i made once. they were good, but they had nothing on bakers delight cheddermite scrolls so i abandoned savoury baking for another few years. This year i started getting curious though. I'd look at savoury muffin recipes and make faces, it just wasnt how god intended muffins to be! but still, there would be that little voice inside me going "but you love bacon, why not put it in a muffin? bacon goes well with everything... except maple syrup." then i would agree with the little voice "no, never maple syrup. crazy canadians."
Then today, i was thinking about what kind of muffin i wanted to make. i owed my dad some baked goods, he likes eating the spoils of my baking for breakfast, and the last of the chocolate peppermint cupcakes i made on the weekend went to my mums work them to eat while watching their weekly super exciting training video. now dad puts up with alot of weird, fruity cupcakes and you never hear a complaint, so i thought i would bake something just for him. to show just how lovely i am, i baked what i thought i may never ever bake... savoury. savoury MUFFINS no less. it was a very big, internal struggle for me, but i went out there, i spent 10 minutes looking for cornmeal, i didnt find it, but i didnt give up. i asked someone where it was, they asked me if it was the same as cornflour, i said i was pretty sure it wasnt, we said a few more things, then we found it. under its sneaky alias, 'polenta.' then i went to the deli and asked for sundried tomatoes, the girl asked if i wanted SUNdried, or SEMIdried. she was surly and made me feel silly for not knowing the difference. but i soldiered ON. i wasnt going to let the savoury muffin win this round. no no no. making the muffins was super easy, the sundried tomatoes were stinky but i managed to look past that when i saw how quick the muffins rose! polenta has some serious risability to it. i like it. We all had a little taste once they came out of the oven and numMERS! i dont even like sundried tomatoes and i liked them. So please, if you are scared of savoury muffins, know that i was once like you and have overcome these fears. My crippling fear of spiders remains but since i cant fix that with baking, i think i'll just ignore it for a bit and eat some of my new savoury muffins!
Cornmeal, in one of it's many packages.

Sundried tomatoes, getting their stinky oil all over the place.

the sundried tomatoes deceiving me into thinking they are bacon. i need to stop talking about bacon.

I havent worked with cornmeal before (incase i hadn't already made that blatantly obvious) so i wasnt sure how much they would rise, and the recipe book wasn't helping me out any, so i filled to here. the outer part of the cupcake didnt rise at all, but it domed up in the middle. I reckon next time i'll fill them up to a bit before the top and see what kind of wild ride that takes me on.

probably a misleading angle, makes them look all huge and mighty, but really they are pretty small.

Corn muffins with sun dried tomatoes

Muffin bible

Each of the recipes in the book is meant to make 12 muffins but this only made seven itty bitty little muffins. So i would recommend doubling this recipe. Fo sho. (You'll have to do the maths though, maths is not what im about). Foodbits.

  • 60g coarse cornmeal (or polenta, or whatever the shop feels like calling it that particular day)
  • 70g plain flour
  • 2tsp caster sugar
  • 1 1/2 tsp baking powder
  • 1/4 tsp salt
  • 1 small egg
  • 100ml milk
  • 1T corn oil (psht, like i was buying a bottle of corn oil just for this, i used vegetable oil)
  • 25g sundried tomatoes in oil, drained and finely chopped. (as you can see in the picture these muffins arent LOADED with tomatoes, and im really just all about overkill when it comes to choc chips and anything you add to muffins, so i reckon you could add like 40 or 50 grams of tomatoes and it would be more deliciouso without tampering with the muffin too much. ALSO while eating these i did remember my 'bacon makes everything better' rule and got to thinking. Next time i make these i reckon i would add a little salami or of course, bacon. Add anything you like really, a bit of garlic, olives, follow your tastebuds.)
What to do with the foodbits
  • preheat oven to 220C (ive got a fan forced so i lowered the temp to 200C)
  • Stir all dry ingredients in a bowl.
  • beat egg with milk and oil and gently mix into dry mixture.
  • fold chopped sundried tomatoes into batter.
  • spoon into greased muffin pans (they were a little hard to get out, but only because they were so solid. its worth the effort getting them out though, i think they would look weird in pretty cupcake cases, plus maybe they would stick to the paper.)
  • bake for 12 minutes. (the tops wont brown much, but the bottoms do so dont worry if they look slightly pale)

Saturday, September 19, 2009

Coffeeshop failure, pineapple flower success!

A little while ago I was asked by a coffeeshop owner to bake some of my cupcakes for them so they could see if they wanted to buy them off me and sell them in their store. At this point i think i was very lucky that i didnt widdle myself on the spot. Ive been so bored and have wanted to bake, but not eat all the baking, so i figured this would be perfect! I went into the shop with a list of cupcakes i can make (which i spent aaages preparing excitedly) and handed it over. The lady looked at it and said "oh, i dont care what you make, make anything, except peanut butter, i hate anything with peanut butter in it." i should have known from that moment something was wrong and that i should not even attempt to do business with these people, i mean, who doesnt like peanut butter baked goods?? I tried to talk to her about what prices she would be looking at paying, how many a day they would want, just to get an idea whether i could do this but she brushed me off and said she would see me the next day with my samples.
So i rushed home and made three of my favourites, black bottom cupcakes (chocolate cake with a dollop of cream cheese baked into the middle, nummers!) cookie dough (you'll just have to wait till that one comes, trust me though, it's worth it!) and hummingbirds. I was up till midnight, i was exhausted, and still had to decorate them the next morning. But i was still excited and my keen-ness kept me going. All that left the second i turned up though. Before she even tried my cupcakes or even really looked at them, she told me that the prices i was asking were too much, and they were really just looking for a colourful, plain cupcake for kids. I looked over at my hours of baking, my 30 dollar investment, wasted. I wasnt trying to rip her off, i was asking less that what i sold them for at the markets, i figured out i would be making less than 10 dollars an hour even at the price i was willing to sell them at. I left them with her though and told her to get back to me. I know it sounds like im a horrible baker in denial, but really they were just looking for a wholesale seller who could afford to sell their cakes for peanuts. I asked around and everyone that has met this lady agreed she was scary, wish i knew that before! But oh well, all an experience! Plus it inspired me to make these super pretty pineapple flowers I found in martha stewart's cupcakes. Totally worth it just for that. (Did this make me sound bitter? I meant to sound all 'whatevs' about it but reading over it, eep, i smell bitter... whoops)
Here are my lovely samples all ready to go in my lovely cupcake courier, which i would marry if it were legal.

And here are my lovely pineapple flowers all close up. Stylin' no?

And an aerial shot for reference later.

Dried Pineapple Flowers

Martha Stewart Cupcakes

Makes 24 flowers

2 large or 4 small pineapples, peeled (I only bought one pineapple, and because it was my first time giving it a go, i admittedly only got like 5 decent looking flowers. If you need alot of them, and youre unsure of your cutting skills, probably get 2 pineapples)

Preheat oven to 110C. Line two baking trays with baking paper. Use a small melon baller (or in my case a knife) to remove pineapple 'eyes.' Use a large sharp knife to cut pineapple into very thin slices. (I thought i wasnt cutting mine thin enough but just did my best, and they still worked really well, so dont freak out if yours arent paper thin, when they are dried out they shrink down a fair bit.) (Here is where im going to reference the aerial shot. My pineapple slices were all smooth and round, but i wanted them to look more like petals so i cut triangles out of the edges, i think you can see this best on the left flower. Up to you if you want to do it, i just like it this way!).

Place slices on baking trays. Bake until tops look dried, about 30 minutes and flip them. Bake until completely dried, about 25 to 30 minutes more. (Go a little more or less depending on thickness. Mine were done on the second side after like 20 minutes, so you just have to keep an eye on them). For curved flowers place them in a muffin tin, otherwise just leave them on a wire rack. (I dried mine on a rack but they still dried curved up). Once cooled, flowers can be stored in an airtight container at room temperature for up to three days.

jersey caramel cookies and the fimfam, a lovely mix.

A few months ago my mum found this recipe in the sunday paper by donna hay, it seems kind of un-donna-ish; jersey caramels dont scream class to me but hey, im not classy and am in no place to judge donna so i cut it out and saved it. I wasnt just saving it for any time though, i knew that if i baked this and my cousin wasnt around to eat them all, well, he might just never let me see his beautiful little kiddies again, and i just couldnt have that. so i held onto the recipe untill they came up for a visit. it sure was tough though. Finally the other week they came up and graced me with their super energetic presence and i greeted them with hugs, cheek pinching, and the only thing they really wanted, cookies with jersey caramels in them. oh and dont judge your cookies by mine, i got distracted (as per usual) and overcooked them a little. my peeps didnt seem to mind though, and we managed to eat a fair few of them before my cousin's middle child heath came and ate the jersey caramel out of the middle of all the leftovers. i can tell my cousin is a real dad because he ate the soggy chewed caramel-less biscuits heath left behind, ah, love.
day 2 of their visit we made our way down to the park. heres my little toby, not so little anymore.
An action shot of heath, his whole life seems to be an action shot, not sure if i have any photos of him not moving!
And my little goddaughter ruby doo, i put her on the roof, she seemed pretty okay with it.
Oh yeah, and the cookies i was talking about before! Donna's didnt spill over like mine, but i kind of like them like that, derish!
Caramel Cookies Donna Hay Makes about 16

Ingredients

  • 60g unsalted butter (i always just use normal butter, its probably an offence punishable by death in real baking kitchens so yeah, shhh, dont tell donna) (and possibly a little extra butter, see note in method)
  • 1/3 cup golden syrup
  • 1/3 cup brown sugar
  • 1 1/2 cups self raising flour (after months of using american and english recipes, i was so excited to actually be able to use self raising flour again!)
  • 8 jersey caramels halved (or if you can't get jersey caramels, just use any soft, chewy caramel lollies)

Method

  • Preheat oven to 180C. Place the butter, golden syrup and sugar in a saucepan over low heat and stir until the sugar is dissolved. Allow to cool.
  • Add the flour to the butter mix until a smooth dough forms. (My dough was really dry and crumbly so i just melted a little more butter and added it a bit at a time till it stuck together. As you can see in the picture they were still a little dry so i guess a little too much is better than not enough).
  • Roll tablespoonsful of dough into balls and place on baking trays lined with non stick baking paper. Press to flatten and top each with half a caramel. Bake for 10-12 minutes or until the cookies are golden.

Friday, September 18, 2009

oreos and cheesecake and 21st birthdays, oh my!

So the other day was my sister’s boyfriend’s 21st. I’d already bought him an early birthday present in August (a 10 bucka copy of hotrod) but decided it wasn’t quite enough so I thought i’d give him the gift of cheesecake, martha stewart style. I got martha stewart’s ‘cupcake’ book a little while ago and have been using every excuse possible to bake the hell out of that book, its awesome, i want to bake pretty much everything. I’ve only baked like three and my oh my, it was a sin martha was ever jailed, how dare they take her baking abilities away from the world?? psht, whats a little insider trading when there are oreo cheesecake cupcakes to be baked!
One thing I have to say about martha’s recipes is that they always make ALOT. Doing the shop for these cakes was a little embarrassing, a kilo of cream cheese, two boxes of oreos, wow. I tried to work on my “dont worry, it isnt all for me, its a present!” face in the mirror before I went to the shops but it was too specific so i just settled for my “someone else gave me their shopping to do, what a crazy list huh?” look. No one actually cared though so it was okay. Just like when i was doing my shop for my baking stall at the markets, oh, i thought there would be gasps as i put all that flour in my trolley, at least an interested look, turns out everyone is just interested in their own shopping, sigh, what a world we live in. Okay back to it, here are some visual aids to help you to realise just how much you want to get your oreo cheesecake bake on.
The oreos, partway through me smooshing them to pieces. Well actually i just chopped them with a knife but i still kind of smooshed.
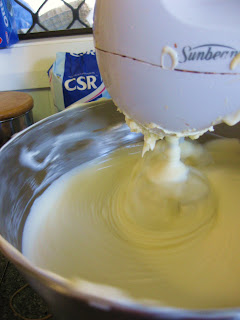
It’s no seafoam green kitchenaid (swoooon) but it mixes a kilo of cream cheese like that! (thats around where i clicked my fingers, didn’t you hear?)
In go the cookies… I didnt crush them up too much, if you do you just get the idea there are oreos in there, i wanted it to be all about the oreo goodness.
Okay so this next photo is good for several reasons. all the paper cases look pretty together you can see the oreo surprise at the bottom (shh, dont ruin the surprise for anyone else) you can see how high you’re meant to fill them, though i reckon you could even go a little more, i just got nervous) After they were all baked i got too excited by how cool they looked from underneath that i forgot to take a photo of them from above… lame. But heres the good part, when you cook them theyre just setting so they dont rise at all really, so they end up looking pretty much like they do before they go in to oven, so woo, it doesnt matter that i forgot, hopefully…
I only have two cupcake tins and so very lilttle patience, so I just got a brownie tin, put some oreos on the bottom and spread the leftover mix on top. I left the oven at the same temp and cooked it about half an hour i think? i should have paid attention. But yeah, just keep an eye on it, give it a poke, if its firm it should be good to go. I have to say that i kind of preferred this to the actual cupcakes. I havent had cheesecake in a while and the cupcakes themselves were very cheesecakey, which can be awesome but this was good because it had a thinner layer of cheesecake. Each to their own.
Now the recipe says to cool the cupcakes in their tins, then store them in their tins till serving. I think this is silly, i left mine in the tins for like ten minutes then checked them and the tins looked like this. Soggyyyyy. So i took them all out and cooled them on wracks then put them in containers and left them in the fridge. I was scared they would collapse or something but they were fine. Silly martha, so overprotective of her cheesecakes.

Okay now try and say that this is not supercool. I want to hear someone say it, i really just dont think anyone could. I dont even think it matters that we dont have a photo of the top of the cake, this MORE than makes up for it, right? yes, right!

So in conclusion, I’ve been told the cupcakes were a hit, they got a little slimy on top but my people didnt complain, i just worried. I would definitely make them again, theyre just a little different to the usual cupcake and yeah, awesome. Please enjoy them, care of martha!

Cookies and Cream Cheesecakes Martha Stewart, Cupcakes Makes 30

Ingredients

  • 42 oreos (or the like) 30 left whole and 12 coarsely chopped
  • 910g cream cheese, room temperature
  • 1 cup sugar (i used castor sugar but im sure normal sugar is fine)
  • 1tsp vanilla extract
  • 4 large eggs at room temp lightly beaten (ive never really gotten the whole room temp thing when it comes to eggs. i never actually do it and it works okay…)
  • 1 cup sour cream (ive never made a cheesecake before, the sour cream freaked me out a little but it was good!)
  • pinch of salt

What to do with it all

  1. Preheat oven to 135C (seems super cold, i was worried i had converted it wrong, but hey, all was good!) Line standard muffin tins with paper liners, place one whole cookie in the bottom of each.
  2. With an electric mixer on medium-high speed, beat cream cheese until smooth, scraping down sides of bowl as needed. Gradually, add sugar and beat until combined. Beat in vanilla.
  3. Drizzle in eggs a bit at a time, beating to combine and scraping down sides of bowl as needed. Beat in sour cream and salt. Stir in chopped cookies by hand.
  4. Divide batter evenly among cookie filled cups, filling each almost to the top. Bake until filling is set, about 22 minutes. Transfer tins to wracks to cool completely. refrigerate in tins at least 4 hours, remove from tins just before serving. (Or be a rebel and do like i did! I know, im wild.)